Why Temperature and Edge Control Define Good Butchery
Cooking great meat consistently requires two basic physical disciplines: a clean, razor-sharp edge to slice without tearing muscle fibers, and exact internal thermal monitoring to prevent overcooking. Whether you purchase whole primals or specialized portions from local custom-cut butcher shops, relying on timing or surface appearance almost always leads to inconsistent doneness. A dull knife crushes the tissue and squeezes out valuable moisture before the meat ever hits the skillet or grill grate, while guessing core temperature ruins even well-marbled cuts.
Professional shops handle dozens of carcasses each week using dependable handheld tools rather than expensive kitchen gadgets. The foundational instruments in any processing room or prep station are a well-maintained carbon or stainless steel knife and a reliable internal temperature sensor. Neither tool needs to be extraordinarily costly, but both require a clear understanding of build quality, material limits, and practical mechanics. A high-grade blade keeps its edge through dense connective tissue, while a responsive sensor takes the guesswork out of thermal carryover.
Investing time into learning proper blade maintenance and thermometer selection pays immediate dividends in the kitchen. When you know precisely how heat moves through dense protein structures, you can pull roasts, briskets, and poultry at the exact target threshold. Paired with a properly beveled edge that glides cleanly along fat caps and bone structures, your preparation workflows become faster, significantly safer, and far more rewarding. Understanding these tools transforms home meat preparation from an uncertain chore into an exact culinary craft.
Comparing Thermometer Styles for Kitchen and Smokehouse Use
Finding the best kitchen thermometer starts with understanding that no single style handles every cooking scenario equally well. The market generally divides into fast handheld instant-read meters, cabled leave-in probes designed for oven or smoker chambers, and fully untethered radio-frequency or remote probes. An instant-read device gives you a quick snapshot across multiple areas of a bird or steak, revealing thermal gradients between the outer surface and the central core in a few seconds.
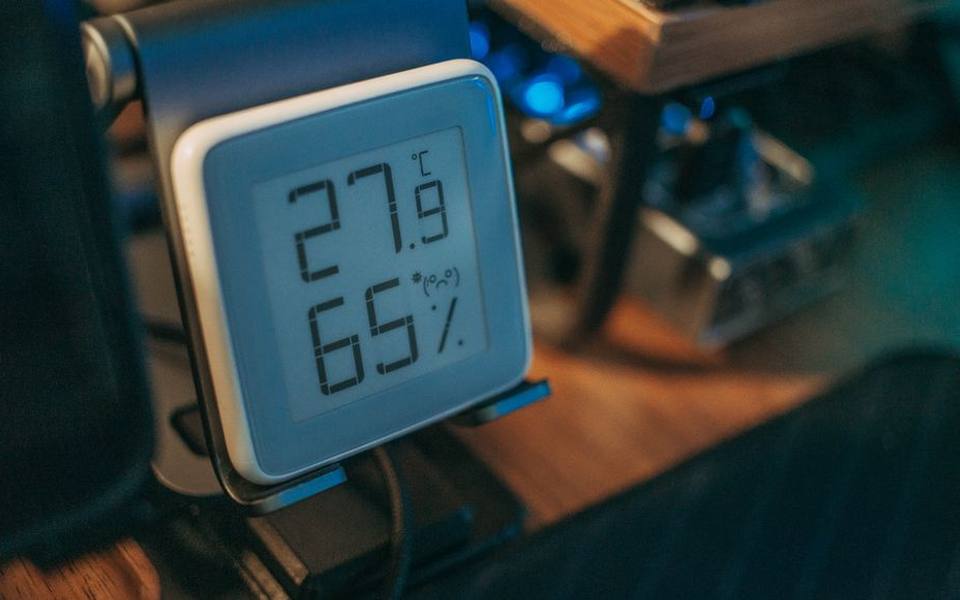
By contrast, leave-in probes remain embedded inside the protein while it cooks inside an enclosed cooker. These units feature heat-resistant cables running from the meat to an external base station sitting safely on the counter or pit shelf. They monitor gradual internal heat changes without forcing you to open cooker doors, which preserves steady ambient humidity and prevents heat loss. For slow-roasting large primal pieces or monitoring dense pork shoulders over eight hours, leave-in instruments provide continuous tracking that handheld gauges cannot match.
Bimetal dial gauges still appear on budget cookers, but they respond far too slowly and drift out of alignment easily under normal kitchen conditions. Digital options rely on micro-thermocouples or thermistors that detect fraction-of-a-degree fluctuations almost instantly. If you need a single general-purpose food thermometer for checking pan-seared pork chops, deep fryer oil, and baked loaves, an instant-read digital handheld probe is typically the most versatile investment for everyday prep.
Evaluating Build Quality in Top Rated Meat Thermometers
The best rated meat thermometer models earn high marks because of response speed, sensor placement, and accuracy margins rather than flashy digital displays. Lower-tier digital sticks often place their sensor an inch above the pointed tip, forcing you to push the probe too far through thin cutlets or flank steaks. Commercial-grade instruments position a micro-thermocouple within the final two millimeters of the tip, letting you pinpoint the true cold core of any cut with exact precision.
Speed determines convenience and safety when working over intense charcoal fires or hot cast-iron skillets. A top-tier cooking thermometer settles on an exact reading in two seconds or less, minimizing the time your hand lingers over direct radiant heat. Cheaper consumer sticks often take eight to fifteen seconds to stabilize, during which internal heat rises and hot grease splatters. Rapid readings allow you to check multiple segments of a spatchcocked chicken or whole roast without letting cooking temperatures drop dramatically.
Durability and water resistance also separate professional-grade tools from fragile kitchen novelties. Meat processing involves moisture, fat splatters, washing sinks, and heavy condensation. Look for an ingress protection rating that withstands running tap water during cleanup. A rotating backlit display, automatic wake sensors that activate when picked up, and simple field-calibration functions in an ice bath ensure the tool remains accurate across thousands of cooking cycles without drift.
Leave-In Probes and In-Meat Sensor Placement
Using a dedicated in-meat thermometer probe requires understanding the anatomy of your cut to get a meaningful reading. Muscle tissue heats unevenly, influenced by nearby bone structures, thick fat pockets, and the proximity to the heat source. Bones conduct heat faster than surrounding muscle fiber, which means inserting a metal probe against a rib bone will register a falsely elevated temperature long before the center is cooked.
To position a meat cooking thermometer properly, locate the geometric center of the thickest muscle bundle away from visible pockets of gristle or bone. On poultry, push the probe horizontally through the deepest part of the breast parallel to the cutting board, or into the thickest section of the inner thigh without hitting the joint. For thick-cut steaks or butcher shops with dry-aged beef strip loins, slide the probe through the side so the tip rests precisely equidistant from the top and bottom crusts.
Cabled leave-in units also require careful physical handling to prevent wire failure. The stainless steel braided wire connecting the sensor probe to the receiver unit contains delicate inner conductors that kink or pinch under heavy cast-iron lids. Avoid exposing the wire directly to open wood or charcoal flames, which can exceed the silicone or steel sheath limits and ruin the sensor's internal resistance calibration instantly.
Selecting Modern Wireless and Bluetooth Cooking Thermometers
The rapid development of wireless cooking thermometer hardware has removed cables entirely from high-heat roasters, rotisseries, and outdoor smokers. These systems consist of a self-contained metal probe housing internal battery power, core temperature sensors, and ambient pit sensors within a single rigid cylinder. Because there are no external wires, they work seamlessly on turning rotisserie spits where conventional cabled probes would quickly twist, tangle, and snap.
Signal transmission range is the primary performance factor when choosing the best wireless meat thermometer for home use. Basic short-range Bluetooth links often struggle to penetrate thick steel smoker lids, double-pane oven glass, and exterior brick walls, losing connection if you walk into another room. Advanced setups pair the probe with an external charging dock that acts as a signal booster, relaying readings through long-range radio signals or local home Wi-Fi networks directly to your mobile phone.
Battery management and minimum insertion depths require extra vigilance with fully wireless units. Because the probe holds heat-sensitive internal electronics and lithium power cells, the shaft must be inserted past a marked safety groove into the cold meat mass to prevent thermal destruction from ambient heat. Despite their higher cost, these monitors provide real-time cook graphs and estimated resting times that make them exceptionally practical for long, low-temperature barbecue sessions.
Managing Thermal Carryover and Final Meat Temperatures
Even the best rated food thermometer will yield dry meat if you fail to account for carryover cooking during resting. When meat cooks under direct heat, the outer layers absorb far more thermal energy than the interior core. Once removed from the heat source, that high surface energy continues driving inward, raising the internal temperature by several degrees depending on the cut's overall thickness, density, and cooking temperature.
Small single-portion steaks cooked at high pan temperatures typically rise three to five degrees while resting on a warm board. Massive cuts like prime rib roasts, briskets, or whole pork loins can climb eight to twelve degrees over a twenty-minute rest period. To achieve a perfect medium-rare center on beef or tender results on delicate halal meat preparations, remove the cut from the heat when your digital gauge reads slightly below your desired finishing number.
Resting also allows muscle fibers contracted by cooking heat to relax slowly, reabsorbing moisture into the cellular structure rather than pooling on your cutting plate. Cover the cut loosely with foil rather than wrapping it tightly, which prevents trapped steam from softening crisp exterior crusts. Keep your digital probe inserted during the resting phase to observe when the internal temperature peaks and begins its gradual downward slope.
Understanding Knife Sharpening Fundamentals and Edge Bevels
Sharpness is simply the convergence of two smooth steel planes meeting at a microscopic apex. Many cooks confuse honing with true sharpening; using a grooved steel rod only straightens a folded, microscopic edge without removing any metal. Knife sharpening requires removing damaged steel along the bevel to establish a crisp new junction. When an edge dulls, the thin apex rounds off, chips, or folds, requiring abrasives to recreate the cutting point.
Most western butcher knives, breaking blades, and boning tools feature an inclusive bevel angle between thirty and forty degrees, meaning fifteen to twenty degrees per side. A twenty-degree angle per side provides a durable balance of strength and sharpness suitable for splitting poultry ribs and peeling thick silver skin. Japanese-style slicing knives often use narrower angles near twelve to fifteen degrees per side, producing cleaner push-cuts through soft flesh but chipping easily on dense beef joints.
Choosing between synthetic waterstones, oil stones, or diamond plates depends on your sharpening setup and available time. Synthetic waterstones cut hard cutlery steels rapidly and produce a polished, toothy edge ideal for carving, but they require periodic flattening with a truing plate. Diamond plates cut aggressively, stay permanently flat, and handle high-alloy stainless steels easily, making them a practical choice for heavy butchering maintenance.
Step-by-Step Whetstone Sharpening Technique
Mastering knife sharpening how to workflows on a whetstone begins with stable equipment and consistent body mechanics. Soak your synthetic stones thoroughly if required by the manufacturer, then set the stone on a damp cloth or rubber base on a waist-height surface. Hold the knife handle firmly with your dominant hand, placing the fingers of your secondary hand flat against the blade face near the edge to control pressure.
Establish your angle by holding the blade upright at ninety degrees, halving that distance to forty-five degrees, and halving once more to approximately twenty degrees off the stone surface. Maintain that rigid wrist angle while sweeping the blade across the coarse stone from heel to tip in smooth, diagonal passes. The single most crucial milestone on your initial grit is creating a continuous metal burr along the opposite side of the cutting edge, which confirms you have ground completely down to the apex.
Once you feel a uniform rough wire edge along the entire blade with your thumb, flip the knife over and repeat the identical stroke count and angle on the reverse side. After burrs have formed and matched on both sides, progress upward through medium and fine grits, typically from four hundred grit to one thousand and up to three thousand. Finish by pulling the edge lightly through a piece of scrap leather or soft wood to break away loose burr remnants cleanly.
Edge Geometry for Bones, Cartilage, and Game Processing
Different meat cutting tasks require distinct edge profiles and knife geometries to work safely and efficiently. A thin, highly polished razor edge that slices delicate carpaccio will dull almost instantly if used to separate beef vertebrae or debone a deer shoulder. For hunters and home processors managing wild cuts or visiting facilities specializing in deer and game processing, having knives profiled for rugged work prevents edge rolling and costly tool failure.
Curved skinning knives and stiff boning blades perform best with a slightly toothy micro-bevel ground on a medium-grit stone around eight hundred to one thousand grit. This microscopic saw-like tooth structure grabs onto slippery connective tissue, gristle, and dense tendons without sliding off. Flexible boning knives need uniform thinning along their primary bevels so the steel flexes smoothly against skeletal curves without binding or twisting under pressure.
When handling large cuts purchased across retail markets or finding master carvers in butcher shops in Texas, you will notice professional trimmers keeping dedicated knives for distinct tasks. Heavy cleavers and cimeter knives carry broad, convex bevels designed to withstand blunt impacts against cartilage, while straight carving slicers maintain shallow, polished edges for uninterrupted single-stroke portioning. Matching your tool's edge angle to the density of the tissue you cut extends the life of both your knife and your hands.
Routine Tool Care, Storage, and Sensor Calibration
High-performance meat tools require simple, disciplined hygiene and maintenance habits to ensure long operating lives. Never put quality butchering knives or temperature probes into an automated residential dishwasher. The harsh detergents, boiling water, and violent spray arms dull keen knife edges, degrade wooden and composite handles, and breach the moisture seals protecting digital thermometer housings.
Wash your blades immediately after cutting using warm water, gentle dish soap, and a soft sponge, wiping away from the cutting edge to avoid accidents. Dry the knife thoroughly with a clean kitchen towel before returning it to a wooden block, protective magnetic strip, or blade sheath. If your knife features high-carbon steel, wipe the clean metal with a drop of food-grade mineral oil to shield it from atmospheric moisture and rust between processing sessions.
Calibrate your food thermometers regularly to verify accuracy before handling critical holiday roasts or commercial cuts from butcher shops in California. Fill a tall glass with crushed ice and cold water, let it settle for three minutes to reach thermal equilibrium, and stir the probe tip in the bath without touching the glass sides. Your display should register within one degree of thirty-two degrees Fahrenheit; if it drifts, use the device's reset button or hex adjustment to restore baseline accuracy.
Published 2026-09-20 · reviewed with each rebuild, last September 2026.
Find butcher shops near you
The directory lists 13,556 butcher shops by state and city — pick your state or use the “Near me” button in the header.
More guides
-
 Buying
Flank Steak vs. Skirt Steak: The Complete Flat Cut Guide
-
 Storage
Storing Fresh Meat and Deli Cuts: Refrigerator and Freezer Timelines
-
 Money
MoneyUnderstanding Beef Prices: Retail Costs, Hanging Weight, and Bulk Buying
-
 Buying
Ribeye vs. New York Strip: Flavor, Marbling, and Texture Compared
-
 Storage
Freezer and Fridge Meat Storage Guide: Shelf Life, Freezing, and Safety
-
 Buying
Ribeye vs. New York Strip: Cut Comparison, Flavor, and Texture
-
 Buying
A Complete Guide to Roasting Prime Rib and Navigating the Butcher Counter
-
 Money
MoneyUnderstanding Beef Costs: From Everyday Retail Cuts to Bulk Whole Cattle Purchases
-
 Buying
Complete Guide to Beef Tenderloin and Filet Mignon
-
 Buying
Bistro Steaks: How to Choose, Prep, and Grill Flank, Flat Iron, Hanger, and Bavette
-
 Buying
Beef Short Ribs, Plate Ribs, and Flanken Cut Guide
-
 Buying
A Guide to Cornish Game Hens, Guinea Fowl, and Specialty Poultry
-
 Buying
Chorizo, Andouille, and Specialty Artisan Sausages: A Practical Guide to World Styles
-
 Buying
Butcher's Guide to Pork Shoulder, Boston Butt, and Country-Style Ribs
-
 Buying
Butcher's Guide to Ribeye, Tomahawk, Cowboy, and Chuck Eye Steaks
-
 Buying
A Guide to Offal, Beef Tallow, Bone Marrow, and Specialty Cuts
-
 Buying
A Butcher's Guide to Deli Meats, Cured Cuts, and Charcuterie Selection
-
 Owning
Butcher Tools Guide: Thermometers, Knife Sharpening, and Essential Supplies
-
 Buying
Corned Beef Brisket: Cut Selection, Home Curing, and Cooking Guide
-
 Buying
Beef Short Ribs and Korean Kalbi Buying and Cooking Guide
-
 Buying
Grass-Fed Beef, Pasture-Raised Meat, and Clean Meat Sticks: A Buyer's Guide
-
 Buying
Pork Spare Ribs, St. Louis, and Country-Style Ribs Guide
-
 Storage
The Practical Guide to Dry Aging Beef at Home and Choosing Equipment
-
 Owning
Butcher's Guide to Rich Chicken Broths and Regional Homemade Soups
-
 Buying
Bacon-Wrapped Jalapeño Poppers: A Complete Butcher's Guide
-
 Buying
A Butcher's Guide to Pork Sirloin Roasts, Stuffed Chops, and Crown Cuts