Understanding the Leaner Cuts of the Pork Loin
The pork loin represents one of the most versatile primals on the entire hog, stretching along the animal's back from the shoulder blade down to the hip. Depending on where a butcher cuts into this muscular stretch, you end up with radically different culinary profiles. Toward the front, near the shoulder, the meat carries more rich fat and connective seam; toward the back, it transitions into lean, finely textured muscle that demands thoughtful cooking. Navigating a full meat counter means knowing how these distinct sections perform under heat.
Many home cooks mistakenly treat every pale pink cut of pork as interchangeable, but applying the wrong technique to a lean muscle quickly produces dry, chalky results. Center-cut portions lean toward tenderness with a firm grain, while end portions like the sirloin offer rich, mineral flavor balanced against a tighter muscle bundle. When you visit a full-service counter, understanding these regional nuances allows you to choose cuts that match your intended preparation rather than guessing based on package size.
Whether you are planning a high-heat weeknight dinner or an ornate weekend gathering, the loin family covers the entire spectrum of dining occasions. Sourcing whole or portioned cuts through independent butcher shops gives you direct access to whole-carcass butchery where primal cuts are properly trimmed, rested, and tied. Having your butcher customize the thickness, bone trim, or fat cap transforms even economical selections into restaurant-caliber meals.
The Versatile Pork Sirloin Roast: Boneless vs. Bone-In
Positioned at the rear of the loin adjacent to the ham, the pork sirloin roast represents one of the best values in the butcher case. This section incorporates several intersecting muscle groups, giving it a slightly darker hue and a deeper, more robust pork flavor than the pale center loin. While it does not feature heavy marbling, a well-cut sirloin roast retains enough natural moisture to stay remarkably juicy when cooked with moderate heat, making it an everyday workhorse cut.
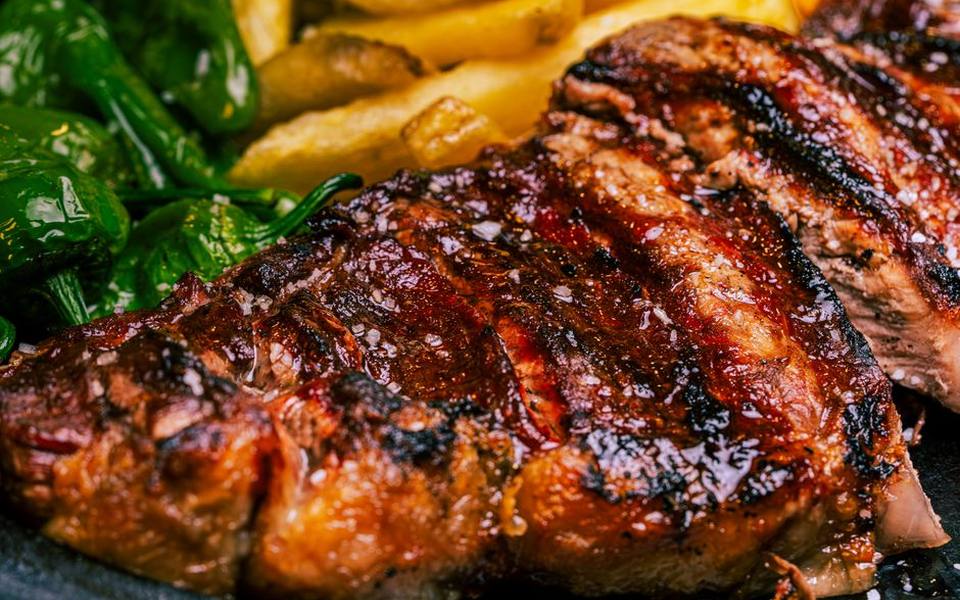
Choosing a boneless pork sirloin roast offers convenience and uniform slicing. Because the butcher extracts the pelvic bone and hip socket, the meat can be neatly rolled and netted with butcher's twine. This compact, cylindrical shape ensures that the meat cooks at an even pace from end to end, eliminating the cold spots or overcooked corners that often plague irregular roasts. Boneless roasts are particularly easy to carve into clean medallions for family dinners or meal prep.
In contrast, a pork sirloin roast bone in delivers extra flavor and natural insulation during roasting. The underlying bone structure slows heat penetration, protecting the center of the roast from drying out while creating rich pan juices suitable for reduction sauces. While carving around the bone takes a modest amount of knife work at the table, many traditional cooks prefer the bone-in version for its rustic presentation and moisture retention. Expect bone-in cuts to require slightly longer roasting times compared to their boneless counterparts.
How to Cook a Tender Pork Sirloin Roast
A reliable pork sirloin roast recipe relies on accurate temperature management rather than heavy marinades. Because the sirloin contains very little intramuscular collagen to break down, extended high-heat roasting will scorch the exterior before the core finishes cooking. A balanced method involves seasoning the exterior generously with coarse salt, cracked pepper, garlic, and fresh herbs like rosemary and thyme, allowing the roast to rest at room temperature for roughly thirty minutes before entering the oven.
For a classic boneless pork sirloin roast recipe, roasting at a moderate heat—typically around 325 to 350 degrees—produces an even gradient from crust to core. You can sear the roast in a heavy cast-iron skillet first to build a golden Maillard crust, or let a convection oven develop color naturally over the course of the cook. Using an accurate meat probe is essential; remove the pork when it reaches an internal temperature between 140 and 145 degrees, as carryover cooking during resting will bring it to the recommended safety benchmark.
Resting is non-negotiable for lean sirloin. Cutting into the meat immediately upon removing it from the oven allows valuable juices to spill out across the cutting board, leaving the slices chewy and dry. Let the roast sit loosely tented with foil on a cutting board for at least ten to fifteen minutes. Slice thinly across the grain of the meat to shorten the muscle fibers, which dramatically improves the tenderness of each bite.
Center-Cut Pork Chops: The Gold Standard for Weeknights
Center cut pork chops are carved from the middle section of the loin, where the meat is tender, mild, and uniform. Depending on the butcher's setup, these are sold either boneless or bone-in, the latter often resembling a miniature T-bone or ribeye steak. The bone-in rib chops contain a single curved rib bone and exceptionally tender eye meat, while the T-shaped porterhouse chops feature both the loin eye and a small tenderloin medallion separated by bone.
The primary advantage of center-cut chops is their predictability in the pan. Because these muscles do very little heavy lifting on the live animal, they are naturally tender without requiring long braising times. However, their lean profile leaves very little room for error when exposed to high heat. Thin supermarket chops can turn leathery in under five minutes, which is why sourcing thicker chops—ideally an inch to an inch and a half thick—is crucial for retaining moisture.
Working with a meat specialist skilled in custom cutting allows you to specify chop thickness down to the quarter inch. A thick-cut chop gives you enough thermal mass to build a deeply browned, savory crust on the exterior while keeping the center tender and slightly blushing pink. When shopping, look for chops that display a rosy pink hue with fine white flecks of intermuscular marbling and a clean exterior fat rim.
Searing and Grilling Center-Cut Pork Chops
The best center cut pork chop recipes focus on fast, controlled cooking that maximizes surface caramelization without overcooking the lean interior. A two-zone cooking method works exceptionally well whether you are cooking on an outdoor grill or using a stovetop-to-oven pan setup. Start by salting your chops at least an hour in advance, or overnight on a wire rack in the refrigerator, to dry the exterior surface and ensure an even, crisp sear.
Begin by searing the chops over high direct heat in a hot skillet with a splash of high-smoke-point oil. Once both flat sides have taken on a deep golden color, prop the chops up on their edges with tongs to render and crisp the strip of fat along the back ridge. If your chops are more than an inch thick, transfer the skillet to an oven preheated to 350 degrees to gently bring the interior up to 140 degrees without charring the crust.
Basting with whole butter, crushed garlic cloves, and fresh sage or thyme during the final two minutes of pan cooking adds rich aromatics and keeps the outer muscle fibers hydrated. Just as with roasts, center-cut chops need a mandatory five-minute rest before serving. Pair them with pan sauces built from dry white wine, chicken stock, whole-grain mustard, or caramelized apples to complement their subtle natural sweetness.
Stuffed Pork Chops: Sizing, Pocketing, and Fillings
Stuffed pork chops elevate everyday center loin into a substantial, festive entrée. To make a successful stuffed chop, you must start with a double-cut chop, which measures roughly an inch and a half to two inches thick. Attempting to cut a pocket into a standard thin supermarket chop usually results in tearing the meat, causing the filling to spill into the pan and burn before the pork cooks through.
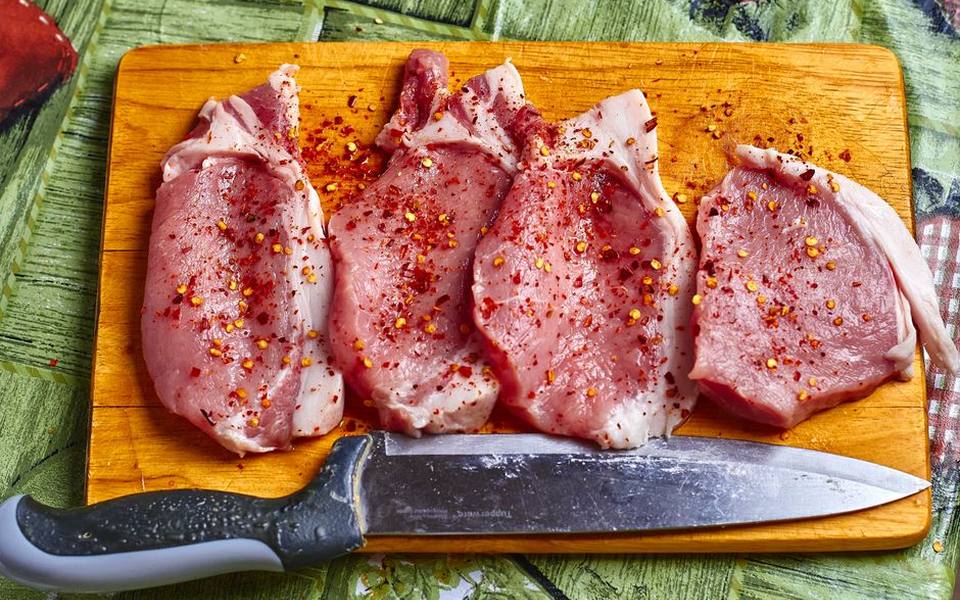
Creating the pocket requires a sharp, narrow boning or paring knife. Cut horizontally into the thickest part of the chop, starting from the fat-capped edge and slicing inward toward the bone, creating a roomy cavity while keeping the outer incision relatively small. Skilled counter staff at traditional butcher shops in Pennsylvania and across the Midwest will happily pocket chops upon request, ensuring the internal pocket is maximized without puncturing the back wall of the meat.
Fillings should always be fully cooked and cooled before stuffing into raw pork chops to maintain food safety and avoid undercooked interiors. Classic breadcrumb mixtures loaded with sautéed shallots, tart apples, celery, and toasted pecans provide texture and acidity that offset the lean meat. Other excellent combinations include wild mushrooms with gruyère, or spinach, garlic, and crumbled prosciutto. Secure the opening with a wooden toothpick to keep the stuffing contained throughout cooking.
The Crown Roast of Pork: Anatomy of a Showstopper
A crown roast of pork is arguably the most dramatic centerpiece available from the whole hog, rivaling prime rib in visual impact while remaining far more budget-friendly. This showstopper is crafted by taking two whole bone-in pork rib racks—typically containing anywhere from twelve to sixteen ribs total—and sewing them together into an upright, circular cylinder. When inverted and shaped, the exposed rib bones flare outward like the tips of a royal crown.
Crafting a proper crown roast requires meticulous butcher work. The butcher must carefully frenched each rib, meaning all meat, fat, and connective tissue is scraped entirely clean from the top two to three inches of bone. Next, the chine bone along the spine must be cut away or scored between each rib segment, giving the rack enough structural flexibility to bend into a continuous circle without snapping the delicate bones.
Because of the labor and skill involved, a crown cut is rarely sitting pre-assembled in the retail display case. Most reputable shops, including meat markets across Texas and other regions known for high-volume entertaining, require several days of advance notice to source matching rib racks and tie the roast. Ordering a crown cut by rib count—calculating roughly one to two ribs per adult guest—ensures you leave the shop with exactly the right size for your gathering.
Roasting and Presenting a Holiday Crown Roast
Cooking a crown roast successfully comes down to managing the cavernous center and protecting the delicate rib bones. Before the roast enters the oven, wrap the exposed frenched tips with small squares of aluminum foil to keep the bare bones from charring or turning black. Season the entire surface inside and out with sea salt, ground white pepper, and finely minced herbs, placing the crown onto a sturdy roasting rack set inside a shallow rimmed pan.
While traditional imagery shows a crown roast cooked with stuffing mounded inside its central cavity, experienced butchers recommend against this practice. Packing cold stuffing into the hollow center insulates the innermost meat, prolonging cooking times and risking rubbery, overcooked pork on the exterior before the stuffing reaches a safe temperature. Instead, place an inverted heatproof bowl or ball of crumpled foil inside the center to help the roast retain its circular form, and bake your stuffing separately in a casserole dish.
Roast at a steady 325 degrees until a meat thermometer inserted into the thickest part of the loin muscle registers 140 to 145 degrees. Let the magnificent roast rest for twenty minutes on a serving platter; during this time, replace the protective foil tips with paper frills and fill the center cavity with your warm stuffing or roasted root vegetables. To carve, steady the roast from the top and slice downward between the rib bones to yield individual, bone-in rib chops for each guest.
Demystifying Boneless Pork Rib Meat
Shoppers encountering boneless pork rib meat in the meat case are often puzzled by what cut they are actually looking at. Unlike beef or poultry, pigs do not have a dedicated primal called "boneless ribs." Instead, this cut typically consists of thick strips cut from the rib-end of the pork loin or the upper shoulder blade, trimmed into finger-like portions that mimic the eating experience of ribs without any bones to navigate.
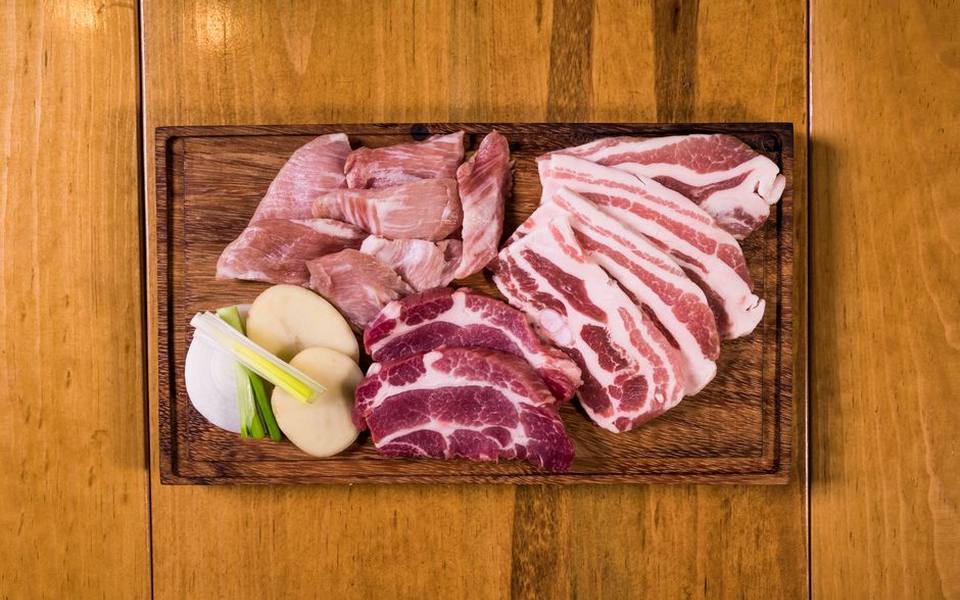
In many butcher shops, boneless pork rib meat is synonymous with boneless country-style ribs. These cuts originate right at the junction where the lean loin meets the fatty Boston butt shoulder. Because of this unique anatomical placement, boneless rib meat contains a higher concentration of intramuscular fat and connective tissue than center-cut loin chops, giving it a deeper color, richer mouthfeel, and far greater tolerance for sustained heat.
The advantage of boneless rib cuts lies in their balance between affordability and culinary adaptability. They deliver the satisfying chew and rich flavor profile of slow-cooked pork without the extended hours or bone waste associated with traditional spare ribs. Whether cut into cubes for stews, skewered for charbroiling, or braised whole in a Dutch oven, these strips offer home cooks incredible versatility on a modest grocery budget.
Braises, Glazes, and Slow Cooking for Boneless Ribs
Because boneless pork rib meat recipes usually balance lean loin fibers with pockets of shoulder fat, the ideal cooking methods combine gentle moisture with bold surface glazes. A quick high-heat sear over charcoal can turn these strips tough if they are not par-cooked or braised first. A low-and-slow approach gently dissolves any seam fat while keeping the meat juicy and fork-tender throughout the cook.
One of the simplest ways to prepare these strips is in a Dutch oven or slow cooker. Season the meat generously with smoked paprika, brown sugar, garlic, and onion powder, then brown the strips on all sides in a hot pan. Deglaze the pan with apple cider, barbecue sauce, or a light ale, then cover and simmer gently on low heat for roughly ninety minutes to two hours until the pork yields easily to a fork.
For those who prefer barbecue, you can smoke boneless rib strips indirectly at 225 to 250 degrees using hickory or apple wood. After an hour and a half of taking on clean smoke, wrap the strips tightly in foil with a splash of apple juice and butter to steam until tender, then unwrap and brush with your favorite glaze for the final fifteen minutes. The result is sticky, caramelized rib meat with no bones to discard, making it an undeniable crowd-pleaser.
Published 2026-09-24 · reviewed with each rebuild, last September 2026.
Find butcher shops near you
The directory lists 13,556 butcher shops by state and city — pick your state or use the “Near me” button in the header.
More guides
-
 Buying
Flank Steak vs. Skirt Steak: The Complete Flat Cut Guide
-
 Storage
Storing Fresh Meat and Deli Cuts: Refrigerator and Freezer Timelines
-
 Money
MoneyUnderstanding Beef Prices: Retail Costs, Hanging Weight, and Bulk Buying
-
 Buying
Ribeye vs. New York Strip: Flavor, Marbling, and Texture Compared
-
 Storage
Freezer and Fridge Meat Storage Guide: Shelf Life, Freezing, and Safety
-
 Buying
Ribeye vs. New York Strip: Cut Comparison, Flavor, and Texture
-
 Buying
A Complete Guide to Roasting Prime Rib and Navigating the Butcher Counter
-
 Money
MoneyUnderstanding Beef Costs: From Everyday Retail Cuts to Bulk Whole Cattle Purchases
-
 Owning
Essential Butcher Tools: Meat Thermometer Buying Guide and Knife Sharpening
-
 Buying
Complete Guide to Beef Tenderloin and Filet Mignon
-
 Buying
Bistro Steaks: How to Choose, Prep, and Grill Flank, Flat Iron, Hanger, and Bavette
-
 Buying
Beef Short Ribs, Plate Ribs, and Flanken Cut Guide
-
 Buying
A Guide to Cornish Game Hens, Guinea Fowl, and Specialty Poultry
-
 Buying
Chorizo, Andouille, and Specialty Artisan Sausages: A Practical Guide to World Styles
-
 Buying
Butcher's Guide to Pork Shoulder, Boston Butt, and Country-Style Ribs
-
 Buying
Butcher's Guide to Ribeye, Tomahawk, Cowboy, and Chuck Eye Steaks
-
 Buying
A Guide to Offal, Beef Tallow, Bone Marrow, and Specialty Cuts
-
 Buying
A Butcher's Guide to Deli Meats, Cured Cuts, and Charcuterie Selection
-
 Owning
Butcher Tools Guide: Thermometers, Knife Sharpening, and Essential Supplies
-
 Buying
Corned Beef Brisket: Cut Selection, Home Curing, and Cooking Guide
-
 Buying
Beef Short Ribs and Korean Kalbi Buying and Cooking Guide
-
 Buying
Grass-Fed Beef, Pasture-Raised Meat, and Clean Meat Sticks: A Buyer's Guide
-
 Buying
Pork Spare Ribs, St. Louis, and Country-Style Ribs Guide
-
 Storage
The Practical Guide to Dry Aging Beef at Home and Choosing Equipment
-
 Owning
Butcher's Guide to Rich Chicken Broths and Regional Homemade Soups
-
 Buying
Bacon-Wrapped Jalapeño Poppers: A Complete Butcher's Guide